Posts

HG One travel chest

Afbeelding
Over the past weeks, Willi Egger has been building and finishing a travel chest made out of elm wood which he designed for my HG One grinder. No nail has been used, all wood-on-wood connections, just a few screws for the piano hinge of the front which has magnetic locks. One of the details I am very impressed with is the handle which is strong enough to carry the 10 kg of the grinder and the chest itself and yet it does not look crude, hiding inside the chest when resting. Willi Egger is the versatile typesetter and book binder from http://www.boede.nl who has previously prepared the 2006 edition of "Het voorbeeldige boek" by Johan Polak for Balans publishers in Amsterdam. He also hand bound two copies of this book (as featured on  http://www.kostverlorenvaart.nl/voorbeeldig/ ). Recently he has adapted software to typeset himself a very complicated English book of math for a publisher in the UK. And a few years back he was on the team of experts who did technical research...

Voel de autoklaaf

Afbeelding
De probe die met z'n vinger in het koffiefilter zit tijdens het koffiezetten is stuk en het was lastig er een vervanger voor te vinden. Idealiter is het maar een kort staafje, maar liever geen draad omdat die weer kwetsbaar is en altijd net weer iets anders kan staan waardoor je ook wat anders meet, het hete water boven de koffie, de gezellige warmte midden in de koffieprut... en de meeste zijn er g lang, ontworpen om ergens in te steken, een stuk vlees in de oven, een lang meetinstrument, een ventiel tussen twee ruimtes. Gelukkig vond ik er een en die heeft nog een pracht naam ook. "Miniatuur Autoklaven Voeler." Autoklaven. Ik wist niet dat die bestonden, maar het is wel goed er een te hebben. Als je eenmaal een autoklaaf hebt, kun je al snel niet meer zonder. Bietjes heb je zo gaar.    

Modifying the Mazzer Mini

Afbeelding
The hopper on my Mazzer Mini is a bit big for my method of single dosing . I typically grind just 14 to 20 grams of beans at a time, enough for one cup of espresso. This way the beans stay as fresh as possible in their bag. In a cafe environment this would be too fussy and there the hopper is very handy as a lot of coffee can be thrown in. There, kilos of beans are used every day so the freshness of the beans should not be at risk.   From the top, the beans travel downward, through the burrs. Peter van der Weerd exchanged the original burrs for the ones made for the heavier Super Jolly model which are identical in size but different in cut. They grind faster which is a bit of a strain on the engine but no problem in a home environment.  Below you see a metal sheet cut and bent to cover the chute , the little tunnel from the side of the burrs into the metal funnel. It is supposed to protect the fingers of any curious kid so they...

Cleaning Mahlkönig Vario

Afbeelding
The little Mahlkönig grinder needed te be cleaned as it hadn't been for a few months. I'm playing with the idea to have it modified and if I take it to a workshop, it should not be clogged up with coffee grounds. The grinder standing up (note the ugly smoke-dark seventies look of the hopper):   Lying down, hopper and top burr taken off: The burrs after a bath -- screws on the left burr need a scrape still: The grinder beneath the lower burr before and after the vacuum cleaner: The micro switch that 'feels' if the hopper is in place. If I replace the ugly hopper, I need to make sure the switch is still on: Lower burr re-installed: Upper burr tightened in as well:

Soldering Pipo

Afbeelding
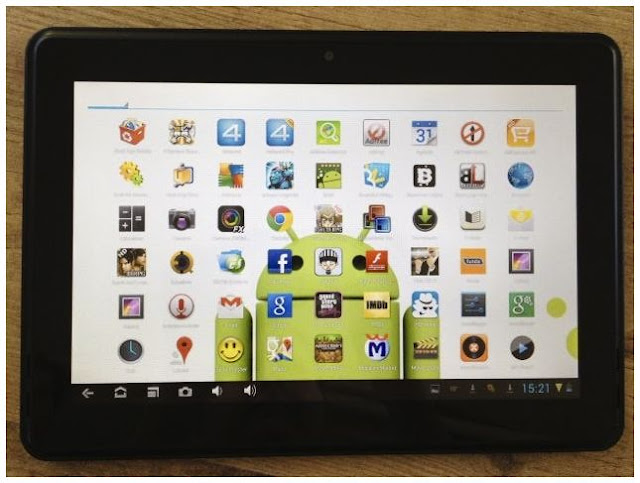
A friend handed me a Pipo M3 tablet that's gone into some kind of screen freeze and asked me if I could fix it. Although I do have a soldering iron, I'm not really good at such things but I was willing to try. And it worked: This is what I did. First a picture of the two diodes that I bought: There's a website ( http://www.slatedroid.com/topic/41687-solved-mod-pipo-m3-touchscreen-issue/page__st__20__gopid__749161#entry749161 ) with a brief description of a possible fix and I used that as a guideline. The trick would be to solder a Schottky diode 1N4148 or 1N5819 to bridge two very tiny parts on the board. I bought both diodes and used the tiniest of the two. Opened the back using a credit card to un-click the front/back connectors. The electronics were insulated by thin plastic sheets fastened with sticky tape. I used the soldering iron to temporarily disconnect the red wire (the plus wire from the rechargable battery). Then I used gaffer tape to isolate t...

Espresso brew pressure profiling: dual OPV on the Rocket Giotto

Afbeelding
Yesterday morning I took my Rocket Giotto to visit Peter van der Weerd from http://www.kafko.nl in his espresso machine workshop. He has made me a temperature probe to fit in a portafilter basket:  (I will post more about this nifty device soon) Since I was there anyway, he took an extra back panel and cut out a square so I could change the setting of the OPV while working with the machine. This way, I wouldn't need to disassemble the covers if I wanted to change the brew pressure setting: I  had been lowering the brew pressure on the OPV but noticed that it would leak water when turned down below 8 bar. Here a few images of this original OPV connection: To be able to easily change the setting of this OPV through the back panel opening, Peter created a bend in the spanner:  An image of the spring inside this OPV: Peter could cut the spring to allow the threaded part to go in deeper but he didn't like this idea as the spring has its...