(also see Daily Coffee News feature ) Tije designed and made the following structure for a tiny and cheap fluid bed roaster, to which Jan van der Weel added the Arduino parts, electronics and programming: Sketch by Tije de Jong Jan sourced a very cheap blower (€ 11) to start with, Tije developed and constructed the mechanics, Jan built together and programmed the TC4 / SSR electronics. On his blog, Jan will specify exactly how the TC4 part is combined and programmed and I will copy these details into this blog entry, just as Jan will use this video in his blog. We did a few test roasts to make sure it works at all and it does. Towards the end, the first roast tended to get a flat BT line and airflow was slightly decreased. 200g seems max load of green beans. Second roast a little more power was given to the heater. Next we will try the Background Roast driven by the PID software of Artisan. A week later, with updated software that works better to change the...
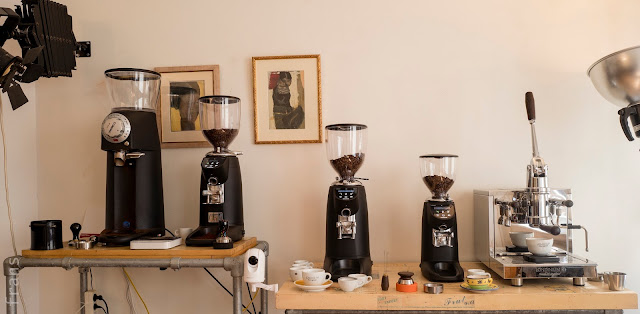
COMPAK models R120, E8, E6 and E5 lined up next to LONDINIUM L-R First impression, notes after a visit from Roemer Overdiep: Roemer came over to taste espressos from all 4 grinders. We made sure to every time have 18g in the 18g VST basket, using the distribution tool, getting about 30g of espresso in about 30s. R120 was best, E8 ‘redspeed’ almost as good, the E6 and E5 were somewhat similar in that the espresso was excellent but in comparison with E8 / R120 it has more ‘sharpness’ — the R120/E8 were softer, more subtle. If someone has excellent beans, an excellent espresso can be prepared with the E5 and only if one also has the bigger E8 nearby would one notice there might be something extra in buying the bigger grinder. Difference between E5 and E6 seems minimal. These tests were done with a first roast of Kenya beans. We poured the beans from the hopper of one grinder to the other while testing and gradually the hippers got emptier. Data about these 4 different sizes gri...
Peter van der Weerd fom KAFKO gave my Rocket Giotto a cleanup and upgrade. It was a great chance to see the intricacies of the E61 brew group inside out and to see some of the details and little tricks one should remember when doing it oneself. Peter encourages people learning about these basic service procedures and when he sends out a set of all necessary parts, he includes a diagram and some instructions. Plus his phone number, because he is available for advice in case someone is surrounded by parts and doesn't know what to do next... What we (well actually he) did: E61 Cleanup, changing seals, removing scale Vibration pump replacement (newer one less noisy), new metal connection Anti-vac upgrade, startup release of water/steam out the front panel now Boiler insulation removed (better looking, better cup heating) Below, lots of pictures telling the story and some brief comments. There's other web pages with extensive info on the E61, like this excellent page (th...



Reacties