Posts

Posts uit januari, 2015 tonen

Finished Pavoni & Fuji PXG4 pid: Probe Inside the Ring

Afbeelding
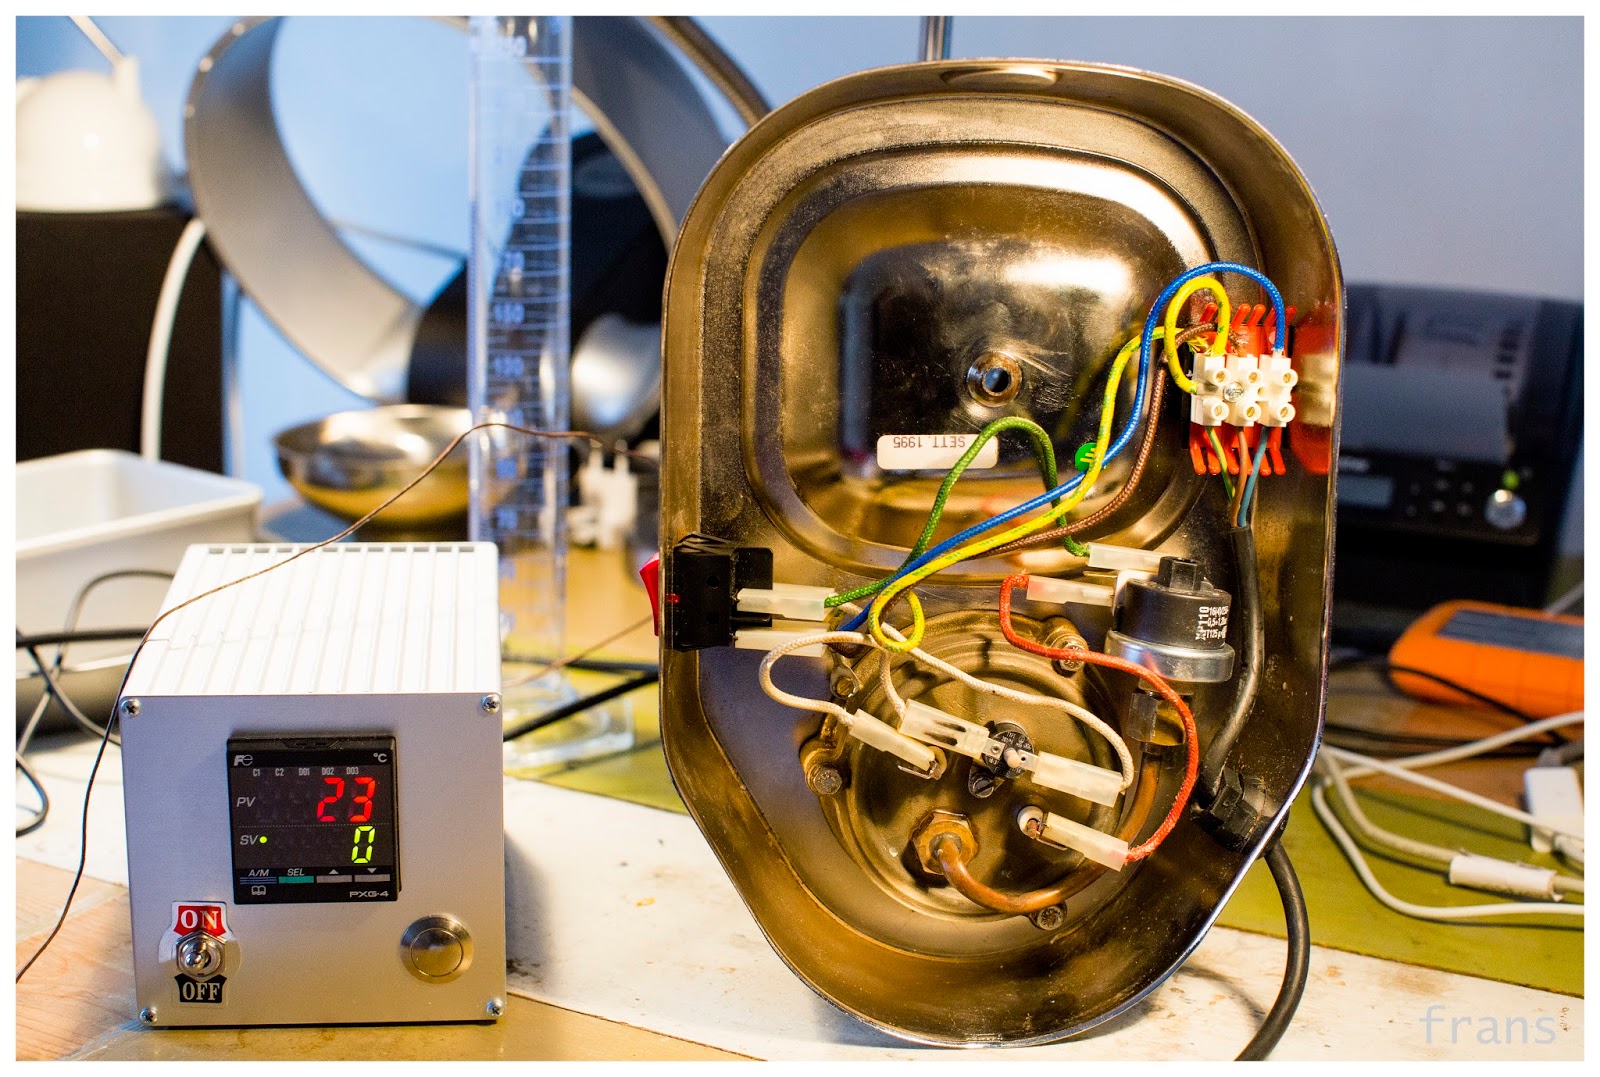
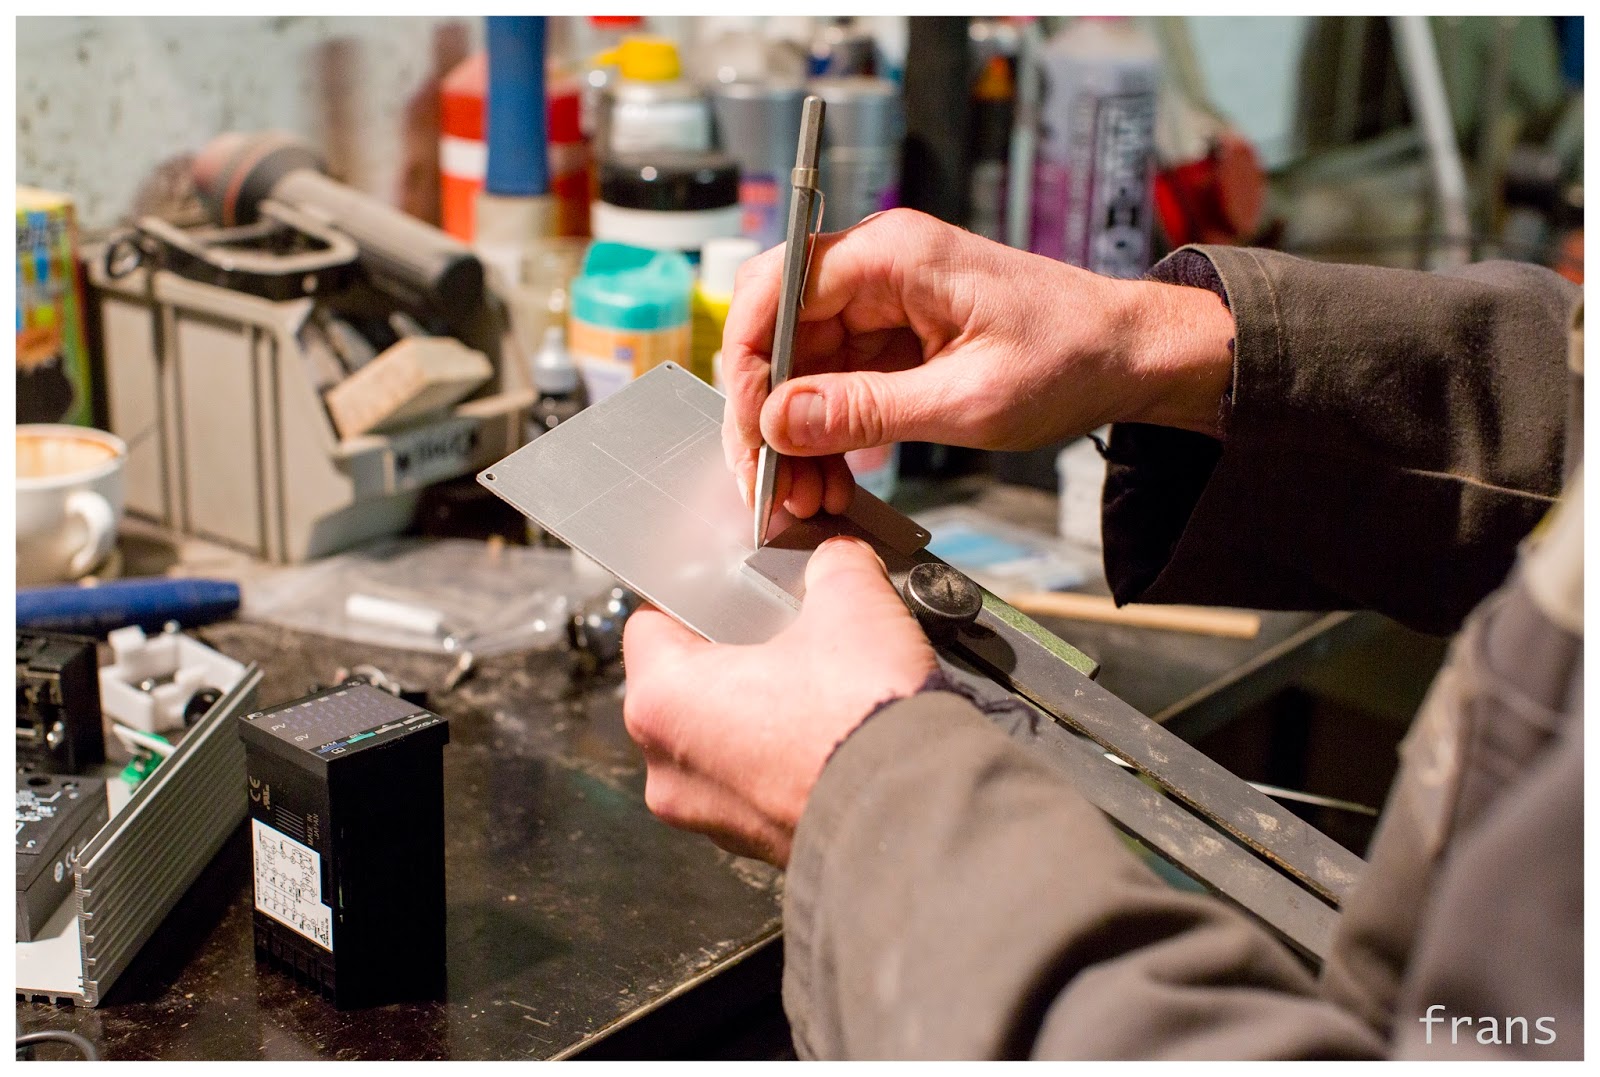
Delicious cup: all the work was well invested! At the end of the previous blog about the pressostat and PID working together , I mentioned that I would like to clean up the xmas tree of wires and have as few cables and probes as possible to visually disturb the classic design of the La Pavoni. Getting rid of the probe that was fastened with copper tape to the top of the brew group was a priority. I wanted to hide a new probe in the cooling fin as close as possible to the brew group. This morning I asked Tije if he could do that. He would need to drill a straight hole of 3mm diameter in the 4mm inner ring of the cooling fin that sits as a tight clamp around the brew group. Always the optimist, Tije set to work: First, Tije made a piece of aluminum to fit the inside of the ring. Drilling a thin hole straight through the curved aluminum, if possible tangentially going through the inside of the ring to touch the brew head directly, you need the support of the temporary insid

Hey look who's on Saudi Arabian tv!

Afbeelding
It is Wa'il! ( and my right hand for a moment )

La Pavoni: Fuji PXG4 PID and Pressostat Working Together

Afbeelding
(Finished project on http://kostverlorenvaart.blogspot.nl/2015/01/finished-pavoni-fuji-pxg4-pid-probe.html ) In my previous post I showed how the boiler of the machine almost gets too hot and pressurized when warming up with the PID temperature probe connected to the Brew Head. I decided it would be best if I could warm up the machine using the pressostat because it is very good  at starting up as fast as possible while keeping the pressure inside the boiler at a modest level. Once the machine is almost on operational pressure & temperature, the PXG4 could take over and make sure the brew head reaches its ideal temperature and stays there too. Thinking this through, it struck me how very convenient it is that at start up, the pressostat is ON, whereas the Solid State Relay of the PXG4 box is OFF as long as the internal program has not been started. So the PXG4 can be ON and helping me monitor the temperature, but it will not start controlling the system until I press th

La Pavoni Brew Group Temp Control

Afbeelding
(Finished project on http://kostverlorenvaart.blogspot.nl/2015/01/finished-pavoni-fuji-pxg4-pid-probe.html ) In the previous post I had a PID made by Fuji, their PXG4, control the temperature in the bottom of the boiler of the La Pavoni. Since I had figured out by measurements and tasting that the extraction temperature inside the puck is at the optimal value if the probe on the top of the brew group measures 88ºC I has subsequently determined that a boiler temperature of 116ºC ensures that at my current room temperature the brew group maintains the desirable temperature. Having the probe that the PXG4 works with on the bottom of the boiler is convenient because the SSR output of the PXG4 also connects to the heating element on a spot below the boiler, so both cables can be bundled which makes for less hassle during transport, for instance when emptying the boiler in the kitchen sink. Most other espresso machines that flaunt a PID also use the boiler connection for their prob

Plotting the Pavoni Pulse

Afbeelding
(Finished project on http://kostverlorenvaart.blogspot.nl/2015/01/finished-pavoni-fuji-pxg4-pid-probe.html ) In the previous post I described how a Fuji PXG4 can control the La Pavoni Pro lever machine. Today I added two extra probes to the free Artisan software  so I could simultaneously monitor the temperatures of three essential points indicating the overall behavior and stability of the machine: 1) BT=Boiler Temperature as measured at the bottom of the boiler 2) Brew Group temperature as measured on top of the brew group 3) Coffee Puck, to see at what temperature the espresso is extracted To connect the two extra probes I used the Amprobe 56 temperature logger . Setup: Artisan program, PXG4 controller, La Pavoni, Amprobe, books about lichens Two earlier tests, not documented here, showed me what's the best Boiler Temperature for an extraction around 93ºC. In such things, taste of the espresso and the looks of the crema (not too light, not too dark, the right &

Time to PID a Pavoni

Afbeelding
(Finished project on http://kostverlorenvaart.blogspot.nl/2015/01/finished-pavoni-fuji-pxg4-pid-probe.html ) Several models of espresso machines have a PID on board these days. As far as I know, all of these are used as mere thermostats, making sure the boiler (and sometimes a second boiler) is kept at the right designated temperature, and since temperature and pressure go hand in hand inside a boiler, also the correct pressure. For a brew boiler, the temperature is most important even though the pre-infusion pressure is relevant as well in a lever machine. For a steam boiler, the pressure is most important to be able to steam that milk to a creamy froth. Still, these values, pressure and temperature , cannot be seen separately. A problem for most PID devices is that it's HOT inside an espresso machine, around 50ºC and the PIDs are mostly designed to survive in an environment of 60ºC maximum. The result is that such a PID inside often has a limited lifetime. On the curr

Wiring the La Pavoni for the Fuji PXG4 controller

Afbeelding
(Finished project on http://kostverlorenvaart.blogspot.nl/2015/01/finished-pavoni-fuji-pxg4-pid-probe.html ) To safely connect the SSR output of the new Fuji PXG-4 controller to the heating element of the La Pavoni, I drilled a hole in the side of the foot of the little espresso machine. A flexible cable (formerly the 220V cable of a Macbook Pro) goes from the Fuji box into the bottom of the La Pavoni and the two connectors that the pressostat was switching are now connected to that cable with cable shoes. Pressostat wires still in place I used tie-wraps to ensure that the new cabling does not touch any of the hot surfaces and another wide  tie-wrap to make sure the cable can't be pulled out by accident. I decided to connect the K-type thermocouple to the bottom of the boiler at the same spot where the thermal fuse is connected. K-type probe at the bottom centre left, SSR cables connected This way, the probe cable and the SSR cable can both use the same exit and

Second Fuji PXG4 temperature controller

Afbeelding
(Finished project on  http://kostverlorenvaart.blogspot.nl/2015/01/finished-pavoni-fuji-pxg4-pid-probe.html ) Early last year I built a roast controller for my Fracino Roastilino home coffee roaster . It reads the temperature from a probe in the roasting chamber and it sends a start-stop signal to the Solid State Relay inside the roaster that switches the heater element. This controller can be programmed to ensure that a certain temperature profile is executed over time with a high degree of precision per second. When a pressostat of one of my La Pavoni's stopped working recently, I thought it would be nice to have a temperature controller much like the one I have for the roaster, but this time incorporating its own SSR (Solid State Relay) to switch the heating element of the espresso machine. It could take over control of the heater, replacing the pressostat. The pressostat is built like the heart of a barometer, a drum-like box with a membrane at one end that can bulge o